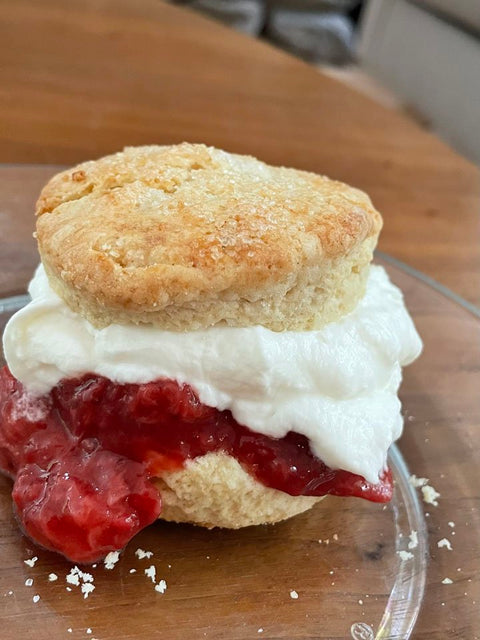
RECIPES ADAPTED FROM ROBERTA'S PIZZA VIA THE NEW YORK TIMES AND ANDREW JANJIGIAN
An oft-asked question we get at Ground Up is whether we have 00 flour, or what we recommend as a substitute, usually for pizza-making. Given that, I thought it would be helpful to take a closer look at 00 flour; what it is, why we don’t currently have an 00-type flour in our product line, and what we use instead.
First, the basics:
Unlike the US, where flour is categorized by its protein, or gluten strength, in Europe, flour is classified by how finely it has been ground. Very finely ground Type 00 sits at one end of the spectrum with Type 2, or very coarsely ground flour, at the other. This number system does not indicate gluten strength, and 00 flours can have a protein range from 8 to 12%. (In US terms, that’s roughly the range from pastry flour to bread flour). 00 flour imported to the US from Italy is made from durum wheat and has a protein content of about 11%. Caputo and Molino Grassi are two of the most widely available brands imported to the US.
Why it’s used:
Durum flour is a starchy, golden-yellow colored wheat flour loaded with beta carotene. It has similar characteristics to bread, or strong flour, in terms of its ability to maintain structure and shape, but it is less elastic than other wheat-derived flours like AP or bread. In pizza crust terms, this means a light, airy crust, more crispy than chewy. Additionally, due to 00 flour’s superfine grind, it requires less water to sufficiently hydrate it. This is an important factor for the pizza-makers of Naples, where pizzas are baked quickly, in scorching hot ovens, and the water in the dough must evaporate quickly.
Still with me?
When I initially became interested in making pizza at home, I tried many different dough recipes. The one I liked best, from the NY Times and the famed Roberta’s Pizza of Brooklyn called for a 50-50 mix of 00 and AP flours. I knew little about 00 flour, except that it was used to make famously delicious Neapolitan pizzas, and that the brightly colored, written-in-Italian bags the flour came in were damn sexy (if a tad expensive). I stuck faithfully, explicitly to this recipe, until the arrival of Dan Richer’s 2021 book The Joy of Pizza. A deep dive into every aspect of pizza-making, a highlighted text box in one of the book’s earliest pages caught my attention. In “The Myth of Italian 00 Flour” Richer explained that the imported-from-Italy 00 flour I was using was often made from wheat that is grown in North America, shipped to Italy for milling, and then sent back to the United States to be sold at a premium. In other words, a lot of miles for a bag of flour.
So is it necessary to make good pizza dough? Hell, no!
First, if you aren’t baking in a Neapolitan-style pizza oven (meaning one that is super hot and in which the pizzas bake very quickly), the low-moisture level of dough made with 00 flour is not ideal. Crispy is nice, but dry is not, and the longer cooking time of a conventional oven can be too much for 00 dough. Furthermore, if you try to source your food locally for environmental reasons, a two-pound bag of flour with more frequent flier miles than you is probably not your best option for making pizza dough.
OK, but why no 00-style option from Ground Up?
Durum wheat is grown predominantly in Montana, North Dakota, Arizona, and California. At Ground Up, we presently source 100% of our grains from Northeast farms and so far, have not found a good option for sourcing local durum wheat.
Additionally, 00-type flour requires roller-milling to achieve its super-fine powder-like texture, and at this time, all Ground Up flours milled on our traditional stone mill.
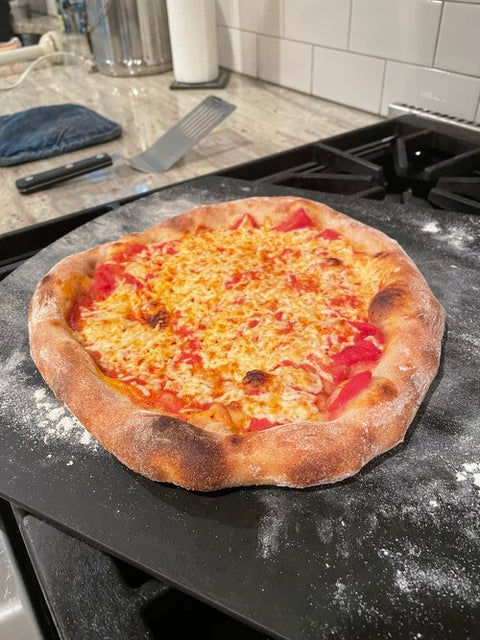
Instead, may we suggest…Ground Up Pizza Flour!
Our pizza flour blend is made with Ground Up Bread Flour and a touch of Valley Malt’s Pale Malt, a not-so-secret ingredient that enhances flavor, color, texture, and rise. Oh, and the bag it comes in isn’t written in Italian, but we think it IS damn sexy. Don’t want bag of special flour just for pizza? No problem. Use our AP or bread flour in your favorite pizza dough recipe and we’re quite sure you’ll be satisfied with the results.
Read on for an easy, adapted version of the earlier-mentioned Roberta’s Pizza Dough recipe using Ground Up’s Pizza Flour, and for you sourdough bakers, a recipe for parbaked thin-crust sourdough pizza adapted from my favorite breadhead, Andrew Janjingian aka Wordloaf.
Quick and Easy Ground Up Pizza Flour Pizza Dough
YIELD: TWO 12 INCH PIZZAS
INGREDIENTS
306 g Ground Up Pizza Flour
8 grams fine sea salt
¾ tsp active dry yeast (I like SAF brand)
1 tsp olive oil
200 g lukewarm tap water
INSTRUCTIONS
1. In a large mixing bowl, combine the flour and salt.
2. In a small mixing bowl or glass measuring cup, stir together 200g lukewarm (about 80F) water, the yeast and the olive oil, then pour it into the flour mixture and mix together with your hands until no dry flour remains, and the ingredients are completely blended.
3. Knead for approximately 3 minutes, then cover with plastic wrap or a damp towel and let the mixture rest for 15 minutes.
4. Knead the rested dough for an additional 3 minutes, then divide it into two equal pieces and shape each into a ball. Place the balls several inches apart on a heavily floured surface or on a baking sheet lined with parchment to prevent sticking. Space them so they have room to rise as they proof. Cover with plastic wrap and let rest for 3 to 4 hours at room temperature, or in the refrigerator for at least 8 hours, and up to 24 hours. (For best flavor and easier handling, the aim for the longer cold proof if time permits.
5. If the dough balls have been refrigerated, give them about 30 minutes at room temp before baking.
To bake indoors, in a conventional oven:
If you have a baking stone or steel, place it in your oven and then pre-heat your oven to its highest temperature. Working one dough ball at a time, drop the ball into a bowl of flour and completely flour both sides. Place the floured dough ball on a counter or work surface and shape it into a circle, using your finger tips to make a crust edge. Then lift and stretch the dough into a thinner, 12” circle.
Dust a pizza peel with flour (or line it with a piece of parchment paper). Assemble your pizza toppings as desired, (for best results, top lightly!) then slide into the hot oven onto the hot stone. (If you’re using parchment paper, slide the parchment AND unbaked pizza together directly onto the stone).
Bake for 5-8 minutes, depending on your oven temp, until the outer crust is risen and browned and the cheese is melted and bubbly.
Using your peel, remove the pizza from the oven and allow it to cool for a few minutes before slicing.
To bake outdoors, in an OONI-style, high heat pizza oven
Bring your oven to temp, then follow the same instructions as above. Do NOT use parchment paper in a high heat oven, and reduce your cooking time to approximately one minute, or whatever is recommended by your oven’s manufacturer.
PARBAKED, SLIGHTLY ADAPTED WORDLOAF SOURDOUGH THIN CRUST PIZZA
I always have this notion that making pizza is fun and easy, but in reality it often winds up being a messy, stressy affair, with flour everywhere and at least one pizza landing face down in the back of my oven. Par-baking elinates all of that. You do some work on the front end, and when pizza night rolls around you can just top, bake, and enjoy pizza, in a way that actually is fun and easy.
The recipe below is adapted for parbaking from my favorite bread expert, Andrew Janjigian. If you are a bread maker and you don’t subscribe to his Wordloaf Substack, I highly recommend it! Also if you don’t want parbake your crusts you can use the pizza balls as soon as they are sufficiently proofed and ready to be stretched.
This recipe makes four 10” pies. The original recipe made 12” pies, but I’ve scaled them back a bit to fit in an OONI-style pizza oven. For best results you will need at least two 10” aluminum pizza pans (like this one) and some parchment paper.
INGREDIENTS
34g Ground Up Rye Flour (light or dark is fine)
6g Ground Up Diastatic Malt Powder
354 g water (75°F)
150g 100% hydration levain (can be ripe or mature)
14g olive oil
16g fine sea salt
INSTRUCTIONS
To make the pizza dough:
1. Place water in medium bowl; scoop out about 2 Tbsp, transfer to small bowl, and set aside. Add levain and oil to remaining water and stir to combine. Add the flours and diastatic malt to water-oil mixture and stir combined. Working in bowl, knead dough by hand until evenly mixed and no dry flour remains. Cover and let sit 30 minutes.
2. Add reserved water and salt to top of dough and knead by hand in bowl until thoroughly combined and even in texture, 1 to 2 minutes.Cover and let sit for 2 hours at room temperature (dough will not rise appreciably during this time). During this time, using wet hands, do 2 sets of coil folds at 45 and 90 minutes.
3. Knead dough on well-oiled counter until even in texture. Divide into four 280g portions and shape into tight, smooth balls (pinch seams thoroughly closed). Coat each ball lightly with oil, and transfer seam-side down to lightly oiled containers (or a baking sheet sprayed with oil and covered well with plastic wrap). Refrigerate for 24 to 96 hours.
To parbake your pizza doughs:
1. Preheat your oven (ideally with a pizza stone in it) to 475°F. Place a square of parchment slightly larger than the pan on each pizza pan.
2. Remove two proofed dough balls and, working one at a time, liberally coat with flour by dipping both sides of it in a bowl of flour and place on lightly-floured countertop, seam- (i.e., bottom) side up. Using fingertips, gently flatten into 8-inch disk, leaving 1 inch of outer edge slightly thicker than center. Using hands, gently stretch disk into 11-inch round, working along edges and giving disk quarter turns as you stretch. I like to pick the dough up and hold it gently with two hands like you are holding the steering wheel of a car, and gently “feed the wheel” or work the edge of the dough all around, allowing gravity to help it stretch, until it is about 12” in diameter.
3. Transfer the stretched dough to a parchment lined pan. The parchment will slide around a bit, and the stretched pizza will shrink back a bit, that’s ok. This is why you are stretching the dough to 12” but ultimately fitting it on a 10” pan. Do your best to fit the dough onto the pan, working the edges to the circular rim under the parchment paper. Make sure the rim is thicker than the center. (Visualize a finished pizza – you will eventually be placing your fillings in the center, leaving the rim as the crust). Repeat the process with the second dough ball, stretching it and then fitting it on the 2nd pan.
4. Slide both pans into your hot oven, ideally onto your pizza stone (You can do them one at a time if both pans don’t fit on the stone). Bake for approximately 5 minutes until the rim of the dough is slightly puffed. Your dough will still be pale in color, but it should not look wet. If it still looks wet in spots continue baking for another minute. Remove from the oven and slip the parbaked doughs onto a rack to cool. The parchment will make for easy transfer. If your dough puffed up like a pita during baking, don’t worry – just deflate when you remove it from the oven by gently tapping it down in the center. Be careful, hot steam will emerge! After five minutes, your dough should still be pale in color, with no brown spots, but look cooked. (If the dough still looks wet, continue baking for another minute).
5. Repeat with remaining dough balls.
6. Allow crusts to cool completely, ideally on a cooling rack, and then transfer to a ziploc bag or bread bag and freeze until ready to use.
WHEN YOU ARE READY TO MAKE PIZZA:
1. Allow par-baked crust to defrost for approximately 15 minutes.
2. Pre-heat your oven to its hottest temperature.
3. Top pizza as desired, but for best results, top sparingly!
4. Slide your topped pizza onto a peel or a baking sheet and transfer to your very hot oven. You do NOT need to flour or cornmeal your peel or baking sheet to prevent sticking. (See note.)
5. Bake for 60 seconds to 6 minutes, depending on the style of oven you are using. (See note.)
6. Let pizza cool slightly before slicing.